Table top Surface
Roughness Tester


Table top Surface Roughness
Tester
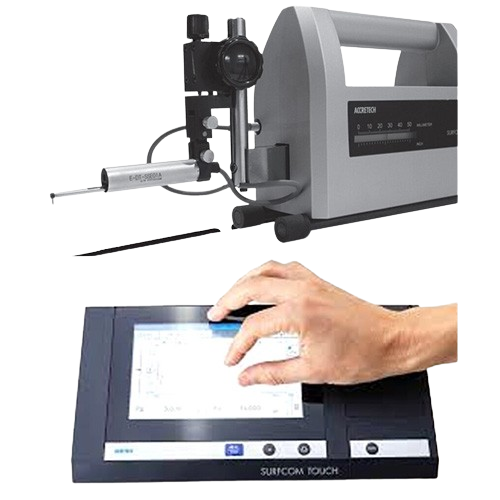
SURFCOM TOUCH 50 system come with an intuitive and easy-to-use screen for condition setting, calibration, measurement and analysis. An amplifier with a 7-inch wide touch panel and a new interface provides higher operability. Easy-to-use operation eliminates the need of instructions. The high performance pickup with an extended measurement range from 800 to 1,000 μm and a Z-axis minimum resolution of 0.0001 μm allows for wide-range and high resolution skid less measurement. In addition to a flat surface, the roughness or waviness on an undulating surface such as a stepped or round surface can be evaluated with one trace.
SURFCOM TOUCH 50 has skid less measurement with a high-performance pickup while having high resolution and with a wide measuring range. Various types of workpieces can be measured by changing the stylus for deep, long, or small holes or a round surface.
Technical Specification
| Z direction | ±500 μm |
| X direction | 50 mm |
| Evaluation Length | 0.1 to 50 mm |
| Straightness accuracy | 0.3 μm/50 mm |
| Detector vertical movement volume | 50 mm |
| Measurement Speed | 0.15, 0.3, 0.6, 1.5, 3 / 0.05, 0.1, 0.2, 0.5, 1 mm/s (Switching) |
| Pickup Sensing type | Differential inductance |
| Measurement Method | Skid less/Skid (optional) |
| Z direction resolution | 0.0001 μm/±40 μm, 0.00125 μm/±500 μm |
| Measurement force | 0.75 mN |
| Stylus Radius | rtip = 2 μm |
| Stylus Angle | 60°cone |
| Stylus Material | Diamond |
| Calculation Standards | Comply with JIS2013/2001, JIS1994, JIS1982, ISO1997/2009, ISO13565, DIN1990, ASME2002/2009, ASME1995, CNOMO |
| Parameter – Profile Curve | Pa, Pq, Pp, Pv, Pc, PSm, PΔq, PPc, Psk, Pku, Pt, Pmr(c), Pmr, Pδc, Rz82, TILTA, AVH, Hmax, Hmin, AREA, Rmax, Rz, Sm, Δa, Δq, λa, λq, Lr, Rsk, Rku, Rk, Rpk, Rvk, Mr1, Mr2, Vo, K, tp, tp2, Hp |
| Parameter – Roughness Curve | Ra, Rq, Rz, Rv, Rc, Rt, RSm, RΔq, Rsk, Rku, Rmr(c), Rmr, Rδc, Rz94, R3z, RΔa, Rλa, Rλq, Ry, Lr, Sm, S, tp, tp2, PC, RPc JIS, RPc ISO, RPc EN, Pc, PPI, Rp, Rmax, Rz.I, RS, Rmr2, Mr1, Mr2, Rpk, Rvk, Rk, Vo, K, A1, A2, Rpm, Δa, Δq, Htp |
| Parameter – Waviness Profile Curve | Wa, Wq, Wt, Wp, Wv, WSm, WPc, Wsk, Wmr(c), Wmr, Wδc, Wz, Wc, Wku, WΔq, WEM, WEA, WE-a, WE-q, WE-p, WE-v, WE-Sm, WEC-q, WEC-m, WEC-p, WEC-v, WEC-Sm |
| Parameter – Motif | R, Rx, AR, W, Wx, AW, Rke, Rpke, Rvke, NCRX, NR, CPM, SR, SAR, Wte, NW, SAW, SW, Mr1e, Mr2e, Vo, K |
| Evaluation Curve | Profile Curve, Roughness Curve, Filtered Waviness Curve, Waviness Profile Curve, ISO13565 Special Roughness Curve, Roughness motif curve, Waviness motif curve, Upper envelope waviness curve, Rolling Circle Waviness Curve |
| Characteristics graph | Abbot curve, Amplitude density function, Power graph |
| Filter type | Gaussian, 2RC (phase compensation), 2RC (non-phase compensation) |
| Cutoff value – λc | 0.08, 0.25, 0.8, 2.5, 8, 25 mm |
| Cutoff value – λs | None, 2.5, 8, 25 μm |
| Display | 7-inch color liquid crystal touch panel |
| Data output | USB connectors for USB memory, Micro USB connector for USB communication |
| Print output | Inbuilt Thermal printer |
| Language | Japanese, English, Chinese (Traditional Chinese/Simplified Chinese), Korean, Thai, Malay, Vietnamese, Indonesian, German, French, Italian, Czech, Polish, Hungarian, Turkish, Swedish, Dutch, Spanish, Portuguese |
| Power Supply | AC100 to 240 V ±10%, 50/60 Hz, Single phase |
| Power Supply – Charging | Built-in battery (to be charged using AC adaptor), charging period: 3 hours (about 600 measurements can be take when fully charged) |
| Power consumption | Maximum 80 VA |
| External dimensions | Amplification indicator : 320 x 167 x 44 mm/about 4.2 kg for the entire system |
| Standard accessories | Roughness specimen (E-MC-S24C), touch pen (E-MA-S112A), printing paper (E-CH-S25A)*1, instruction manuals, SupportWare II |
